Removing Blu Tack from walls and wallpaper can be a challenging task, often leaving unsightly marks or residue. Whether you’ve just redecorated or are due to return a rented property in pristine condition, understanding effective removal techniques is essential. This guide delves into tried-and-true methods that restore walls to their former glory without damage. Perfect for homeowners and renters alike, these solutions not only protect your walls but also maintain your decor’s integrity. Explore expert tips and avoid common pitfalls with our comprehensive, step-by-step instructions for flawless Blu Tack removal.
Brief Overview
Removing Blu Tack from walls can be tricky due to the oily residue it leaves, often resulting in stains that risk damaging the surface. Employing effective techniques, such as using a magic eraser or white vinegar, can help remove marks without harm. Citrus-based cleaners are particularly adept at tackling stubborn residues thanks to their mild acidity. Preventing future damage involves selecting proper surfaces for Blu Tack use and ensuring walls are clean and smooth prior to application. Adhering to these methods ensures walls remain clean and attractive while preventing unnecessary repairs.
Key Highlights
- Blu Tack’s oily composition causes marks by bonding tightly to wall surfaces.
- Magic erasers remove Blu Tack stains without damaging walls.
- Citrus-based cleaners effectively eliminate tack remnants and leave a fresh scent.
- Use a vinegar and water solution for eco-friendly Blu Tack removal.
- Testing on small areas prevents damage when choosing cleaning methods.
Understanding the Challenge of Blu Tack on Walls
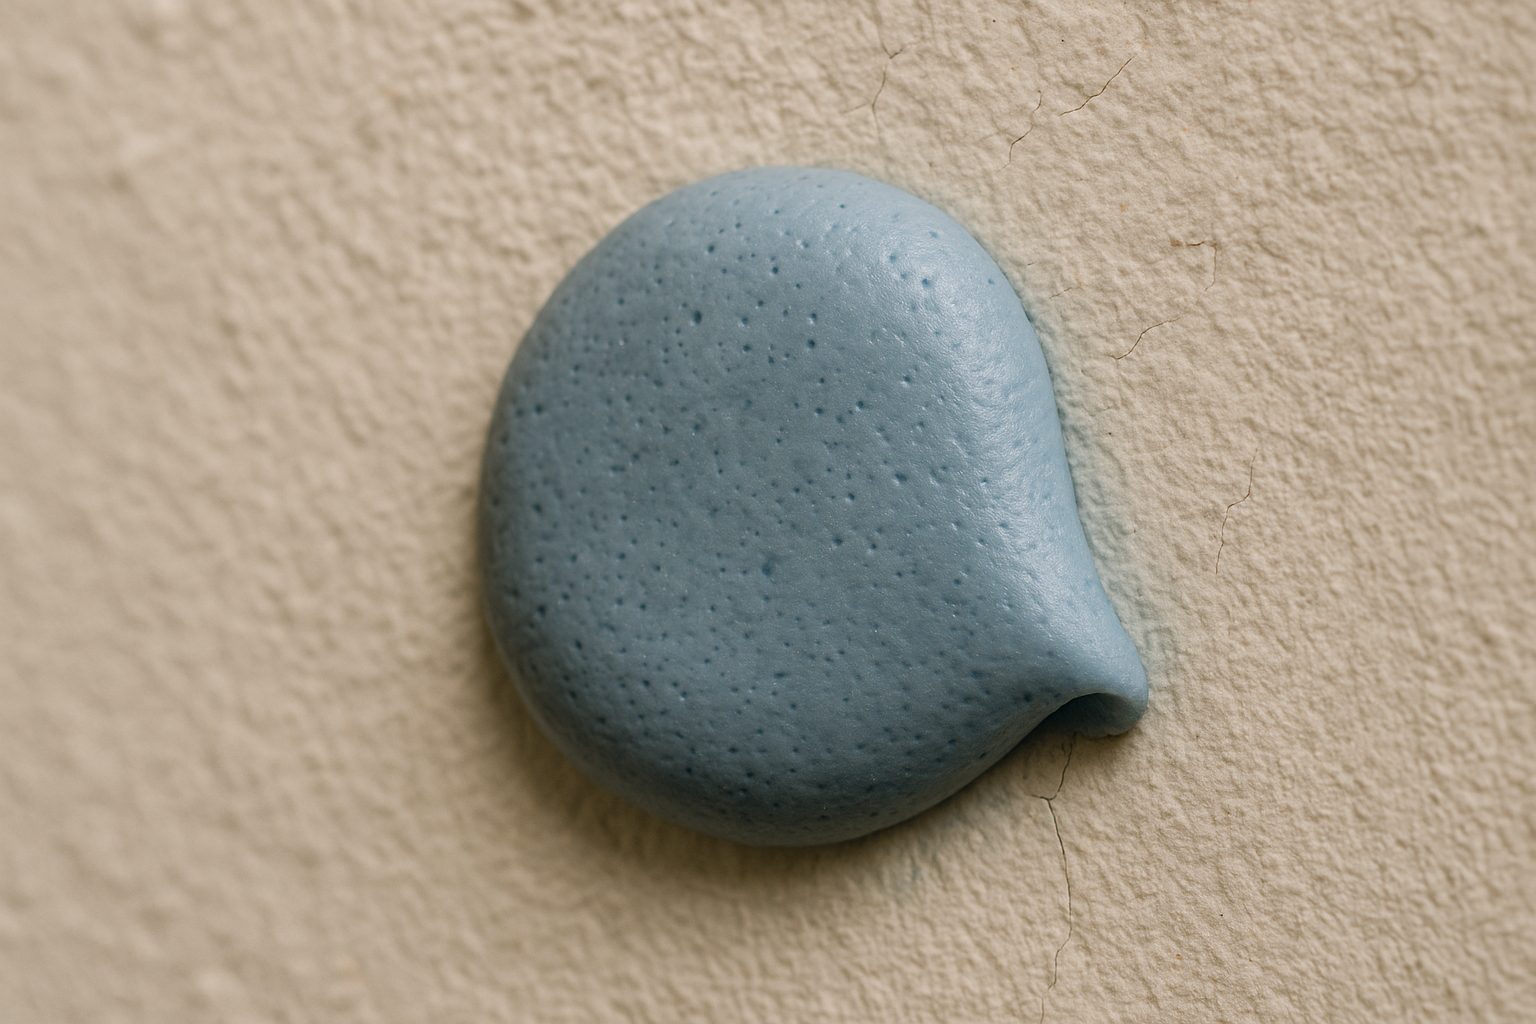
Blu Tack, a popular adhesive, often leaves behind stains and unsightly marks on walls. Tack remnants can cling to surfaces, creating stubborn splotches that mar your decor. Understanding why Blu Tack affects walls can help address these issues effectively. Tack stains are more than just cosmetic concerns, they can compromise the integrity of wallpaper and painted walls. To keep your affected area in pristine condition, it’s essential to know how to get Blu Tack off walls without causing additional damage. In this guide, we’ll explore the common challenges and effective solutions for removing stubborn Blu Tack marks.
Why Blu Tack Leaves Stains and Marks
The primary reason Blu Tack leaves marks on walls is its chemical composition. It contains oils that can penetrate the surface, bonding tightly with paint or wallpaper. This creates persistent stains that are hard to remove without damaging the affected area. When Blu Tack is pressed onto walls, the pressure pushes these oils deeper into the surface, making tack stains even more stubborn. Additionally, when removing it, small tack remnants can break off, adhering firmly to the wall. These remnants are challenging to clean, especially on textured surfaces or delicate wallpapers, leading to lasting discoloration and potential wallpaper damage.
Another factor contributing to Blu Tack stains is the wall surface itself. Porous surfaces, such as unsealed paint or untreated wallpaper, absorb the oils more readily, resulting in more apparent splotches. Even smooth and glossy surfaces aren’t exempt, as they can still show tack marks where the adhesive material has been applied. To effectively address this issue, understanding the type of surface you’re dealing with is crucial. A tailored approach, considering both the wall’s material and the nature of the Blu Tack used, is necessary for effective cleaning and preservation of your decor. Applying these insights, you can ensure your walls remain stain-free and visually appealing.
To effectively tackle Blu Tack stains and maintain pristine walls, consider the following strategies tailored to different surfaces:
- Painted Walls: For walls with standard emulsion paint, gently peel away Blu Tack residue with a dry cloth or eraser. Avoid using water, as it can cause the color to bleed.
- Vinyl or Glossy Paint: Use a soft cloth dampened with soapy water to carefully wipe away marks, ensuring no water seeps into the wall. If needed, apply a minimal amount of rubbing alcohol for stubborn stains.
- Wallpapered Surfaces: Test a small inconspicuous area first. Use a dry cloth to remove residue delicately, as moisture can cause the wallpaper to bubble or tear.
- Textured Walls: For brick or stucco surfaces, use a soft brush to gently lift away Blu Tack remnants. Be cautious with any cleaning agents to avoid discoloration.
- Wood Paneling: Use a combination of vinegar and water applied lightly with a microfiber cloth. Ensure any cleaning solution is wiped dry promptly to prevent damage.
- Plastered Walls: Use a gentle scraping motion with a flexible plastic card or spatula, taking care not to gouge the surface.
- Repaint if Necessary: For persistent or large stains, touch up the wall with matching paint to fully restore its appearance.
Employ these techniques to significantly reduce the risk of stubborn marks on your walls.
Essential Tools and Materials for Effective Removal
Successfully removing Blu Tack from walls requires the right blend of essential tools and materials. Tack stains can be stubborn, and having the suitable cleaning products ensures minimal damage while achieving pristine walls. Essential items include cleaning aids like a magic eraser and a small brush, both invaluable for scrubbing off persistent marks. Additionally, using mild detergents, vinegar-soaked rags, and delicate tools such as a damp cloth help maintain your wall’s integrity. Knowing these tools is key to preventing further damage to your painted walls or wallpaper, ensuring they remain free from tack stains.
The Benefits of Using a Magic Eraser
A magic eraser can be a game-changer when it comes to tackling Blu Tack stains on walls. This innovative cleaning product is designed to remove marks without leaving abrasive scratches or damaging your surfaces. The magic eraser’s unique composition allows it to rub out more than just Blu Tack residue; it can also erase longstanding marks from previously removed adhesive. When used properly, it requires only a small amount of warm water to activate its cleaning properties, making it an eco-friendly choice for your home. Its ability to clean without additional chemicals keeps your walls safe from potential harsh residues that other products might leave behind.
To maximize the benefits of a magic eraser, you should first dampen the eraser slightly, as a dry piece may not effectively remove tack. Gently rub the stained area in a circular motion, applying consistent but light pressure. It’s crucial to monitor your progress and not over-scrub, which could cause unwanted wear on delicate wallpapers. This approach ensures effective stain removal while maintaining the aesthetic appeal of your walls. For deeper, more stubborn discolorations, follow up with a damp cloth and dish soap to wash away any loosened residues. By integrating these techniques, you can keep your walls spotless and protect their appearance over time. Moreover, using a magic eraser alongside a small brush includes added precision, especially with textured surfaces where Blu Tack might cling stubbornly. Always prioritize preventing damage when cleaning, ensuring your home retains its decor’s elegance.
Method 1: The Gentle Approach with White Vinegar
For those confronting Blu Tack stains on walls, utilizing a gentle approach with white vinegar can be remarkably effective. This method cleans without damaging your surfaces, making it suitable for both painted walls and delicate wallpaper. By opting for a white vinegar solution, you’re using a natural remedy that’s both eco-friendly and readily available in most households. This method requires minimal ingredients, primarily relying on white vinegar’s acidic properties to break down Blu Tack residue. We’ll explore a comprehensive step-by-step guide for applying this technique, ensuring your walls remain pristine without chemical abrasives.
Step-by-Step Guide for Safe Application
Implementing the gentle approach with white vinegar begins with preparing your solution. Mix warm water with white vinegar in a bowl, creating a balanced cleaning solution. This combination is key for effectively addressing Blu Tack residue without harsh abrasives. To start, lightly saturate a clean cloth with this solution. Begin by pressing the vinegar-soaked rag lightly onto the affected area, allowing the solution to penetrate and loosen the Blu Tack residue. Heat gently with a hairdryer to soften stubborn areas, then dab with the cloth for optimum results.
As you apply lightly, the vinegar’s natural acidity helps break down the adhesive’s structure, making removal smooth. Continue pressing lightly and follow up with a gentle dab using the damp cloth to absorb loosened stains. If splotches remain, consider using mild dish soap with a damp cloth to wash the area. This cleaning technique ensures Blu Tack is effectively removed, leaving no oily remnants. Remember to dry the area using a soft towel to prevent any moisture build-up that could affect wallpaper or paint integrity. Adhering to this process not only benefits your home decor but also supports sustainable cleaning practices.
Method 2: Removing Stubborn Blu Tack with Citrus-Based Cleaners
When facing stubborn Blu Tack stains on walls, citrus-based cleaners can be a highly effective solution. These cleaners are known for their mildly acidic properties, which help break down tack residue without causing harm to the surface. Using a citrus-based cleaner is an excellent way to tackle and eliminate adhesive leftovers that mar your decor. This method not only provides a thorough cleaning but also leaves a pleasant, fresh scent behind. Ideal for both painted and wallpapered surfaces, this approach is perfect for keeping your home’s aesthetic intact while efficiently removing Blu Tack remnants.
| Step | Action | Purpose | Tips |
|---|---|---|---|
| 1 | Apply Citrus Cleaner | Loosen Blu Tack residues | Test on a small area first |
| 2 | Let Sit for 5 Minutes | Allow cleaner to penetrate | Ensure adequate ventilation |
| 3 | Gently Scrape Off | Remove loosened residues | Use a plastic scraper |
| 4 | Wipe with Damp Cloth | Clean and polish the area | Use warm water for better results |
This table offers a clear step-by-step guide to effectively using citrus-based cleaners for removing Blu Tack stains while preserving wall integrity and maintaining a pleasant atmosphere.
How to Effectively Eliminate Tack Remnants
To effectively eliminate tack remnants using citrus-based cleaners, you’ll need to start by gathering a clean cloth, your choice of citrus-based cleaner, and some warm water. The mild acidity in these cleaners makes them especially useful for breaking down tack residue that can cling to walls. Begin by spraying a small amount of the cleaner on a clean cloth rather than the wall itself, to avoid over-saturation, which might damage the surface. Gently wipe the wall, focusing on the areas with Blu Tack stains. The citrus oils will work to soften the adhesive, making it easier to remove without leaving marks or damaging the paint or wallpaper.
The key is to tackle each section methodically, applying the cleaning solution with gentle pressure. For excessively stubborn areas, you might find it helpful to mix a mild cleaning solution by combining the citrus-based cleaner with water, creating a less concentrated but effective cleaner. After wiping with the cleaner, use a separate cloth dampened with warm water to wipe the area clean, removing any remnants of the cleaner and tack residue. This not only ensures the surface is clean but also helps prevent possible discoloration from leftover cleaning agents. Additionally, this method can contribute to maintaining a fresh-smelling home, contrasting with more chemical-heavy products. Remember, consistency and patience are crucial, repeating the process might be necessary for areas with deeply embedded tack remnants.
Dealing with Oily Residue on Wallpapers
Addressing oily residue on wallpapers from Blu Tack can be challenging but manageable with the right approach. Ensuring you don’t damage the wallpaper while eliminating tack marks is crucial. The residue is often a result of the oily components in Blu Tack penetrating the wallpaper surface, which requires careful handling. Effective cleaning involves using proper techniques and materials, such as mild detergents and DIY solutions. Here, we focus on preventing damage and effectively removing these stains for a seamless finish, ensuring your walls and wallpaper remain elegant and intact.
| Technique | Materials Required | Steps | Precautions | Effectiveness |
|---|---|---|---|---|
| Blotting | Absorbent Cloth | Gently dab the residue | Avoid rubbing | Moderate |
| Cleansing Solution | Mild Soap, Water | Apply & Rinse Carefully | Test on a small area first | High |
| Baking Soda Paste | Baking Soda, Water | Apply & Leave for 30 mins | Avoid scrubbing | High |
| Commercial Cleaner | Specialized Wallpaper Cleaner | Follow Product Instructions | Ensure product compatibility | Very High |
This table underscores strategies to effectively manage oily residues on wallpapers while safeguarding their integrity. By providing concise information regarding materials, steps, precautions, and effectiveness, it serves as a quick reference for maintaining clean and undamaged wallpaper surfaces.
Preventing Damage While Cleaning
To effectively remove Blu Tack residue without causing additional damage to wallpapers, you must prioritize using the correct cleaning methods. Start by carefully inspecting the affected area to evaluate the extent of the oily residue and tack marks. Before applying any cleaning solution, it’s crucial to protect the wallpaper from excessive moisture or abrasive scrubbing, which could lead to irreversible damage. A mild detergent or dish soap mixed with warm water can be incredibly effective. Gently dab the mixture onto the greasy spots using a soft cloth, ensuring you tackle gently and avoid rubbing too hard.
Make sure to blot the area using a clean, dry cloth to absorb excess moisture and repeat the process if necessary. This method will help dissolve the tack marks while preserving the wallpaper’s appearance. It’s important to prevent damage by avoiding harsh chemicals and excessive force. Using a DIY approach with household items allows for safe cleaning, ensuring that your decor remains pristine. If the wallpaper is textured, the use of a small brush can help you reach into grooves, lifting the oily residue without tearing or scraping the wallpaper.
By using these proper techniques, you keep your walls tidy and stain-free. Remember to dry the cleaned areas thoroughly to prevent moisture lingering, which could affect wallpaper adhesion or texture. Ultimately, the goal is to remove Blu Tack and its oily residue effectively while maintaining the wall’s original condition. Your home decor’s elegance is preserved with these steps, creating a protective layer against future stains.
| Step | Action | Purpose | Materials Needed | Tips |
|---|---|---|---|---|
| 1 | Test on a small area | Ensure wallpaper durability | Cotton swab, cleaning solution | Choose an inconspicuous spot |
| 2 | Gently scrape off excess residue | Minimize residue before cleaning | Plastic scraper | Use light pressure to avoid damage |
| 3 | Apply cleaning solution | Break down oily residue | Dish soap, warm water | Use a soft cloth for application |
| 4 | Blot the area dry | Remove excess moisture | Clean, dry cloth | Blot with gentle pressure, do not rub |
| 5 | Examine for remaining residue | Ensure complete removal | None | Repeat cleaning if necessary |
This table succinctly outlines the steps and materials needed for safely removing Blu Tack residue from wallpapers.
Preventive Measures for Avoiding Wall Damage
Preventing wall damage when using Blu Tack involves careful consideration and planning. Before starting your decorating projects, it’s crucial to understand how choosing the right surface can protect your walls from pesky stains and marks. By taking all caution and applying some basic preventive measures, you ensure the preservation of your decor’s elegance. Knowing the best surfaces to apply Blu Tack and the importance of a clean surface are invaluable tips for decorators. Implementing these strategies will not only help in protecting paint and wallpapers but also avoid unnecessary repairs and touch-ups.
| Surface Type | Considerations | Preventive Measures |
|---|---|---|
| Painted Walls | Ensure paint has fully cured; check for any signs of peeling or cracking | Conduct a test patch in an inconspicuous area; use minimal product for lightweight items |
| Wallpapered Walls | Consider the age and adhesive quality of the wallpaper; be mindful of potential tearing | Avoid overloading with heavy items; apply Blu Tack on wallpaper seams rather than flat areas |
| Plaster Walls | Check for uneven surfaces; plaster may crumble under pressure | Clean the surface before application; use supportive backing if necessary |
| Textured Walls | Note surface irregularities, which may affect adhesion | Apply a thin layer and ensure full contact with the texture; avoid removal in high humidity |
This table highlights how making informed decisions about surface types and applying thoughtful preventive measures can preserve the elegance and integrity of your home decor.
Tips for Choosing the Right Surface for Blu Tack
When it comes to using Blu Tack without worrying about damaging your walls, choosing the right surface is a critical step. Not all walls are created equal, and understanding the properties of the surface you’re working with can be the difference between success and costly repairs. For starters, it’s important to consider whether your wall is painted, wallpapered, or covered in a different material. Ensuring the surface is clean and smooth can significantly reduce the risk of stains. Blu Tack can leave marks particularly on porous or uneven surfaces, making thoughtful selection vital.
For painted walls, ensuring they are adequately cured and not freshly coated is a key preventive measure. New paint can easily absorb Blu Tack’s oils, causing unsightly stains. In contrast, smooth surfaces like glass or laminated panels tend to resist staining better, allowing for easier usage of tack. This reveals that careful planning in choosing where to apply Blu Tack can sustainably protect and maintain your home’s aesthetics.
Additionally, it’s wise to perform a small test patch in an inconspicuous area before fully committing to using Blu Tack across the surface. This test allows you to monitor any adverse effects and adjust your approach if necessary. By incorporating these thoughtful techniques, decorators can ensure their projects remain visually appealing while maintaining the integrity of their walls and decor, taking care to protect their investments. With these tips, you’re not only preventing damage but also fostering a safer environment for decorating experiments in your home.
| Surface Type | Preventive Steps | Outcome |
|---|---|---|
| Painted Walls | Test on a small area; use minimal amount | Minimized paint removal or marking |
| Wallpaper | Avoid thick or glossy surfaces; press gently | Reduced risk of wallpaper tearing |
| Wooden Panels | Ensure dry and clean surface; avoid textured areas | Prevent dents and residue |
| Plaster | Limit weight of mounted objects; use evenly | Avoided surface cracking or damage |
This table outlines effective preventive strategies, helping decorators make informed decisions while preserving their wall’s integrity and aesthetics.
Conclusion: Keeping Your Walls Stain-Free
Concluding your journey in maintaining pristine walls requires a focus on simple yet effective strategies to keep them free from Blu Tack stains. By incorporating the right maintenance techniques and practical tips, you can prevent damage and ensure long-lasting care for your walls. From choosing the ideal cleaning products to understanding the best surfaces for Blu Tack application, your home can be future-proofed against stains and unsightly marks. Prioritize regular inspections and gentle cleaning routines to successfully manage these potential challenges and keep your walls looking finished and clean.
| Strategy | Surface Recommendations | Cleaning Tips |
| Regularly inspect and clean wall areas where Blu Tack is frequently used. | Suitable for smooth, non-porous surfaces; avoid using on freshly painted walls or wallpaper. | Use a soft cloth and mild soap solution for cleaning; avoid abrasive materials. |
| Limit Blu Tack use duration to prevent residue buildup. | Test a small, inconspicuous area before applying to ensure surface safety. | Employ gentle, circular motions when applying cleaning agents. |
| Store Blu Tack at recommended conditions to maintain product integrity. | Preferable on surfaces with semi-gloss or satin finishes. | Utilize vinegar or a specialised adhesive remover for stubborn stains. |
| Rotate decorative items to vary pressure points on the wall. | Ensure surfaces are clean and dry before application to optimize adherence. | Rinse thoroughly after cleaning to prevent soap residue. |
This table concisely emphasizes essential practices to safeguard walls from Blu Tack blemishes, ensuring their enduring beauty and cleanliness.
Final Thoughts and Maintenance Tips
When aiming to keep your walls clean and free from stains, it’s crucial to adopt a proactive approach. The key lies in regular maintenance and careful handling, which are both essential for future-proofing your home against Blu Tack blemishes and ensuring a consistently finished surface. Consider developing a routine that involves gentle cleaning and inspection of wall areas prone to adhesives or dirt. For homeowners, the ongoing care of surfaces, including periodic dusting and spot-cleaning, can significantly reduce the risk of tacky remnants leaving lasting marks.
Another valuable tip is to be mindful of the surfaces you choose for Blu Tack application. Opt for smooth, non-porous walls whenever possible, as Blu Tack tends to leave less residue on these types and makes for easier cleaning. Moreover, always conduct a patch test in a discreet area before extensive use to ensure your chosen cleaner or adhesive doesn’t affect wall integrity. A further recommendation is to leverage quality cleaning materials like a magic eraser or citrus-based cleaners, as they can effectively eliminate Blu Tack without harsh chemicals. Regularly reviewing these tips will help you maintain a home free from blemishes, ensuring your walls retain their charm and aesthetic appeal. Remember, consistency is key, as is a gentle touch when dealing with treated surfaces. By incorporating these recommendations, you ensure all your walls are well-maintained and elegantly displayed, reinforcing their visual appeal and sturdiness over time.
| Maintenance Strategy | Key Actions | Recommended Tools | Additional Tips |
|---|---|---|---|
| Regular Cleaning | Dust walls weekly | Microfiber cloth | Use gentle, circular motions |
| Protection | Apply wall-safe tapes | Painter’s tape | Test on a small area first |
| Immediate Stain Removal | Remove Blu Tack promptly | Plastic scraper | Avoid harsh chemicals |
| Touch-up Painting | Paint over persistent stains | Paint kit | Match original wall color |
This table succinctly outlines strategic maintenance practices for preventing and managing Blu Tack stains, offering practical advice and tools for consistent wall care.
Effectively removing Blu Tack from walls and wallpaper doesn’t have to be challenging. By following these methods, you can maintain the integrity and appearance of your walls while ensuring a clean finish. From gentle scraping techniques to the use of household items like warm water and vinegar, these approaches provide practical solutions. Remember to test any solution on a small, inconspicuous area before full application. For ongoing home décor maintenance and more expert tips, subscribe to our newsletter. Let’s keep your walls looking pristine and your space as welcoming as ever.
Frequently Asked Questions
Why does Blu Tack leave marks on walls?
Blu Tack leaves marks primarily because of its chemical composition. It contains oils that penetrate surfaces, bonding tightly with paint or wallpaper. This creates stubborn stains that are hard to remove.
What tools are effective for removing Blu Tack from walls?
Effective tools for removing Blu Tack include a magic eraser, small brush, vinegar-soaked cloth, mild detergents, and a damp cloth. These help in scrubbing off persistent marks safely.
How can I remove Blu Tack stains using vinegar?
Mix warm water with white vinegar to create a cleaning solution. Lightly soak a cloth in it, press on the stain to loosen the residue, and gently dab to clean.
Are citrus-based cleaners effective for Blu Tack removal?
Yes, citrus-based cleaners are effective due to their mild acidity, which helps break down Blu Tack residue. Apply with a cloth to avoid over-saturation and gently clean the stained area.
How can I prevent Blu Tack from staining my walls?
To prevent stains, choose suitable surfaces for Blu Tack, such as smooth, non-porous walls. Ensure the surface is clean and perform a patch test in a hidden area before application.